
A buyer report should help me make a deal decision fast. In a storage acquisition, the report should do three things up front: show the main property issues, put repair costs into clear ranges like $85,000–$125,000, and tell me whether to ask for a price cut, seller credit, repair escrow, or reserve funding.
Here’s the short version:
- I use the PCA to spot visible defects and deferred maintenance
- I do not treat it like a contractor bid, valuation, or code audit
- I want the report to flag what must be handled before closing
- I want short-term and long-range costs sorted into repair buckets
- I need each issue tied to photos, cost ranges, timing, and deal action
- I treat missing records, locked areas, and blocked access as risk items
- I turn the findings into underwriting, reserves, escrow, and seller requests
A strong buyer report is simple: first-page conclusions, system-by-system findings, repair tables, and a deal-impact file that stays in sync through closing. For many deals, escrows land around 100%–125% of expected repair cost, and reserve planning often runs 10 to 12 years.
If I can’t tell the price impact, timing, and closing effect in a few minutes, the report is not doing its job.
Once the scope is set, the next job is simple: put the decision-making points first. Acquisition teams are often reviewing several assets at the same time, under tight deadlines. If the report hides the main call behind pages of notes, people have to dig through the whole thing before they can decide what the asset is worth or how much risk they’re taking on.
This report structure should help with pricing, reserves, and closing decisions. It shouldn’t just act as a record of the walkthrough.
Executive Summary, Property Description, and Document Review
Page one should give the reader the basics right away: property address, inspection date, scope, condition rating, top decision-driving findings, and the total cost range. For example: overall condition fair; immediate concerns include roof leakage, gate failure, and pavement settlement; estimated immediate and short-term costs are $85,000–$125,000, excluding concealed conditions and permitting. A first page like that gives a lender, investor, or asset manager a quick read on risk before they work through the rest of the report.
After that, lay out the property facts that help explain those risks. Include parcel size, rentable square feet, building count, construction type, build and renovation dates, access points, and special features such as climate control, covered parking, wash stations, dump stations, or an office. Also make clear where each figure came from. Was it measured, pulled from records, or supplied by ownership? That small note matters when numbers get challenged during negotiation.
The document review section should finish this opening block. List the roof, HVAC, gate and camera, fire/life safety, occupancy, permit, warranty, invoice, claim, and code records that were reviewed, along with anything that was not provided. If something is missing, say it plainly. For example: manager reports the roof was replaced in 2018; no invoice, warranty, or permit was provided. Missing records should be treated as risks or follow-up items, not quietly read as proof that everything is fine.
System-by-System Findings and Noted Limitations
After the records section, move into the field findings in the same order every time. A fixed order keeps the report easy to scan, especially when someone is comparing multiple assets side by side.
Use this sequence:
- site/drainage
- structure
- roof/envelope
- interiors
- MEP
- life safety
- paving
- security/access
- lighting
- specialty boat/RV improvements
For each system, stick to one format: location, condition, impact, recommendation, priority, cost range, and photo reference. That kind of repeatable layout helps reviewers move fast without stopping to figure out where each piece of information lives.
Limitations also need to sit inside the related system section, not only in a general disclaimer at the end. If a roof area was inaccessible, note it in the roof section and explain why. No reviewer should confuse an area that wasn’t inspected with one that passed inspection.
How Site Photos Should Support Each Finding
Every photo should have its own number, and that number should show up in both the narrative and the repair table row tied to it. A useful caption format looks like this: Photo 07 - Building 1, northeast corridor ceiling, active water staining below roof seam; see Repair Item R-03. That caption tells the reader where the issue is, what’s visible, and which repair item matches it. The payoff is speed: a buyer can jump from the written finding to the photo evidence without hunting through an unlabeled appendix.
Each material issue should be shown with a numbered wide shot and a close-up, then tied back to the matching repair item. If a photo can’t be taken because of locked access, weather, or occupied areas, note that in the caption field and explain the reason. That way, the gap is visible instead of buried.
Once you’ve documented the findings, the next step is to turn them into repair rows that support pricing and reserves. That’s where the repair table does its job. It takes what was seen in the field and turns it into inputs for pricing, reserves, and closing. In plain English, it helps turn the PCA into an underwriting tool.
Separate Immediate Repairs, Short-Term Work, and Capital Replacements
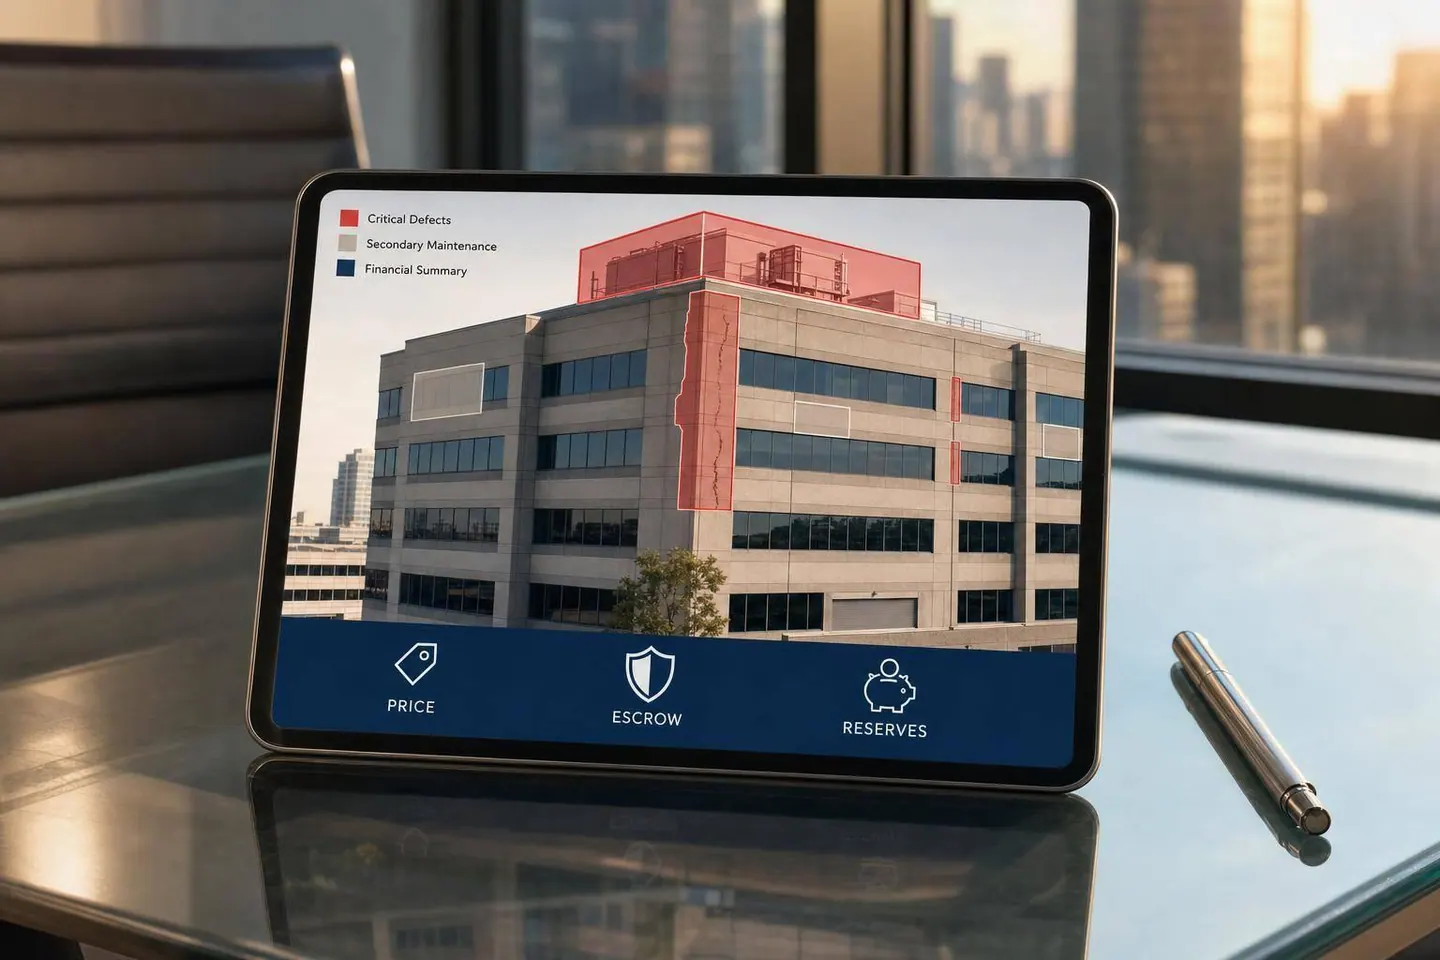
Each finding should fall into one of four buckets: immediate, short-term, capital replacement, or monitor. Sort items by risk and consequence. The point isn’t to label things for the sake of it. The point is to show when something matters and how it could affect the deal.
- Immediate: life-safety risk, active water intrusion, code exposure, or operational interruption
- Short-term: not urgent today, but likely to get worse
- Capital replacement: still working, but close to the end of its useful life
- Monitor: not ready for action yet; assign a trigger and a reinspection date
A gate operator failure that disrupts access is immediate. Original asphalt with 3–5 years of life left fits under capital replacement.
After that, each bucket should flow into a table row the buyer can price and assign.
What Each Repair Table Entry Should Include
Each row should include the priority, location, system, deficiency, remedy, timing, quantity, low/high cost range, useful-life assumption, deferral impact, specialist need, and photo or record reference.
A full entry might read: Gate operator No. 2; access control; intermittent open/close failure; repair or replace after contractor testing; within 30 days; one unit; $4,000–$8,000; 10–15-year life; deferral may delay move-ins and weaken security; gate contractor review required; see Photos 18–20 and June 2026 service ticket.
Once the row format is set, tie every number to a clear cost basis and a short disclosure note.
Cost Assumptions, Contingencies, and What the Estimate Does Not Cover
Every cost in the table is a budget estimate, not a contractor bid. The range should match the level of uncertainty. If quantities are clear and you have recent local invoices, the range can be tighter. If concealed damage, phasing, or permitting may affect the scope, the range should be wider.
A unit-based format makes the math easy to follow. For example, 10,000 sq. ft. of paving at $1.50–$2.50 per sq. ft. gives a range of $15,000–$25,000. That’s much easier to defend than tossing out one flat number. The buyer doesn’t need a contractor scope at this stage. They need a range they can use for deal analysis.
Design, engineering, permits, contingency, and operating disruption can add 10%–20% to the base construction cost. A clear row might show: base construction: $15,000–$25,000; design/permitting: listed separately; contingency: 10%–20%; operating disruption: not quantified - model separately.
Below the table, add a short note with the pricing date, the geographic market, whether costs are stated in current U.S. dollars, and what the estimate leaves out: hazardous-material abatement, concealed damage, lost rental income, and final design. That one note can prevent a common mistake - treating the repair allowance like the full project budget.
These rows then feed the price-adjustment and reserve analysis that comes next.
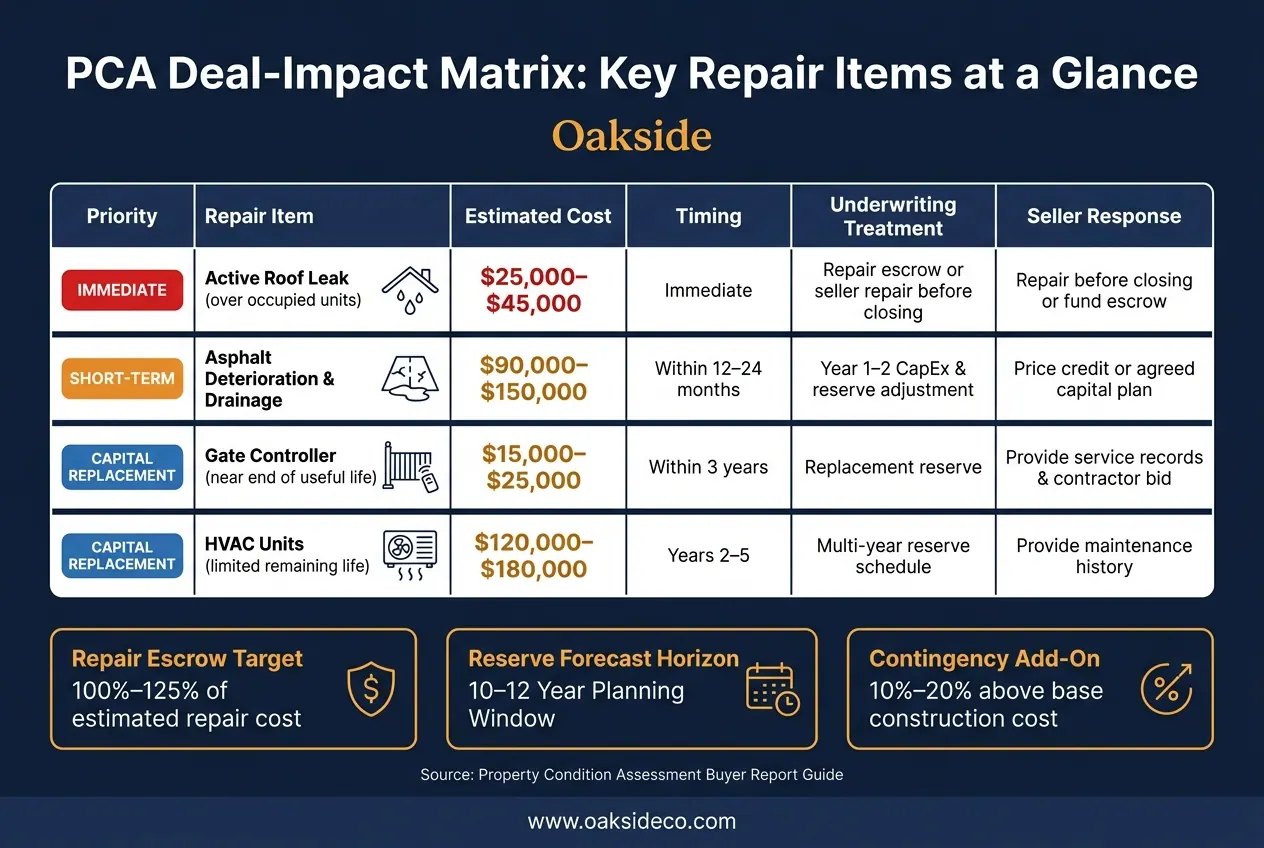
PCA Repair Table: Cost Ranges, Timing & Deal Actions
Once the repair table is done, the next step is simple: turn those findings into deal terms. Keep the same repair-item IDs and photo references in the acquisition file so everyone is looking at the same issue, not arguing over labels.
Turn PCA Findings into Underwriting Decisions
Every material finding should be sorted by four things: urgency, cost, operating impact, and who should handle it. That framework keeps the conversation grounded.
Use a price reduction when the post-close work is clear and easy to measure. Ask for seller repair when the issue involves safety or a breakdown that affects operations. Use a repair escrow or holdback when the scope, permit path, or final cost is still up in the air. If the item is not urgent, it usually belongs in reserves instead of the closing request.
Repair escrows are often set at 100%–125% of the estimated repair cost, with release tied to documented completion, contractor invoices, and permit closeout where needed.
For longer-range items, put the replacement cost into the reserve schedule for the planned replacement year. Then escalate that cost and show what it does to cash flow, reserves, and debt-service coverage in the model, which directly impacts self-storage cap rates and overall valuation. PCA and lender guidance often use a 10- or 12-year replacement-reserve forecast, though the best time frame should match the loan term and hold plan.
Sometimes a condition can be accepted as deferred maintenance already baked into the pro forma. But that only works when the item is quantified, scheduled, funded, and tied to the investment thesis. If it creates an immediate safety, legal, lender, insurance, or operating risk, it should not be labeled routine maintenance. The underwriting memo should spell out the decision in plain English and show the cost and timing in the model, so the PCA and investment committee approval line up.
Add a Deal-Impact Matrix to the Acquisition File
A deal-impact matrix helps turn each finding into a price, reserve, or closing call. Put it in the acquisition file next to the underwriting model.
Each row should show the finding, estimated cost, timing, operating effect, underwriting treatment, requested seller response, and the person responsible for follow-up. Here’s how that looks in practice:
| Repair item / photo reference | Estimated Cost | Timing | Operational Effect | Underwriting Treatment | Requested Seller Response | Follow-Up Owner |
|---|---|---|---|---|---|---|
| Active roof leak over occupied units | $25,000–$45,000 | Immediate | Possible unit damage and claims | Repair escrow or seller repair before closing; include contingency | Repair before closing or fund escrow | Seller, buyer's contractor, lender |
| Asphalt deterioration and drainage correction | $90,000–$150,000 | Within 12–24 months | Access disruption during work | Year 1–2 CapEx and reserve adjustment | Price credit or agreed capital plan | Buyer and civil contractor |
| Gate controller near end of useful life | $15,000–$25,000 | Within 3 years | Potential access interruption | Replacement reserve | Provide service records and contractor bid | Buyer's manager |
| HVAC units with limited remaining life | $120,000–$180,000 | Years 2–5 | Possible climate-control disruption | Multi-year reserve schedule | Provide maintenance history | Buyer, lender, HVAC specialist |
For disputed items, add the report or photo reference, the basis for the estimate, and the status date. Then update the matrix when contractor bids come in, when lender comments arrive, when the seller responds, and after closing inspections. The matrix should show the current status of every open item all the way through closing.
When repair versus replacement is not clear, compare the cost, remaining useful life, disruption, and risk before picking a path. That comparison gives you the support you need for a price cut, reserve adjustment, or escrow request. From there, you can turn those deal points into the seller follow-up request and the closing checklist.
Issue a Written Follow-Up Request Organized by Section and Priority
Once the deal-impact matrix is done, send one written follow-up request, not a messy chain of emails. Keep it in the same system-by-system format as the PCA: roof, HVAC, paving and drainage, gates and access control, fire and life-safety, electrical, plumbing, security, and building interiors. That way, each reply lines up with one observation in the report.
For each item, include a status label - completed, scheduled, disputed, or not addressed - plus a P1–P4 priority. Use the same item IDs from the PCA so the response log stays in sync.
A simple four-part priority system tends to work well:
- P1: life-safety issues, active leaks, major security failures, or code violations that could get worse before closing
- P2: work that would reasonably be expected in the next 6–12 months
- P3: planned capital replacements and reserve items
- P4: missing records, unclear system ages, inaccessible areas, or disputed observations
If the owner says a repair is complete, ask for the backup. That usually means the invoice, scope of work, permit or inspection sign-off, any transferable warranty, and photos if they have them. If the work is only scheduled, request the signed contractor proposal, target completion date, and funding source.
If part of the property was inaccessible during the first inspection, request access before the diligence deadline. If that can't happen, carry a specific reserve, escrow, or closing condition tied to that unknown. No one likes guessing on hidden risk.
That same structure should also shape what the owner repairs and documents before the property goes to market.
How Owners Can Prepare a Property Before Taking It to Market
The PCA categories should also guide pre-market cleanup and file setup. Good prep lowers buyer uncertainty and can shorten diligence.
Visible deferred maintenance should either be fixed or clearly documented. That includes things like active roof leaks, broken gate controllers, failed lighting, damaged pavement, and blocked fire exits. Keep the paper trail together: invoices, permits, sign-offs, and completion photos.
Set up a dated, searchable data room by system, such as roof, HVAC, access control, paving and drainage, fire/life safety, permits, and capital-project records. In the operating file, keep routine maintenance separate from capital spending. For example, HVAC servicing, door adjustments, and minor patching should not be mixed in with roof replacements or paving programs.
That split matters. It helps buyers match the PCA to the operating statements and keeps completed capital work from being mistaken for a recurring operating expense. Clean files can cut down retrade risk.
Conclusion: A Condition Report Should Drive a Better Transaction Decision
A PCA only has value if it shapes the price, reserve, and closing decision. Define the scope before the inspection. Organize findings around deficiencies and costs. Build repair tables with realistic U.S. dollar ranges. Then tie each material item to a deal response, whether that's a price reduction, escrow, reserve, or closing condition.
Scope, findings, repair costs, and deal terms need to stay connected.
Who should review the PCA first?
The buyer should start initial due diligence by reviewing the Property Condition Assessment. It gives a clear picture of the property’s condition before the acquisition moves ahead.
Looking at it early also helps the buyer check the seller’s claims and spot issues with the structure, drainage, pavement, roof, or fencing that could lead to major repair costs.
When should I order contractor bids?
Schedule contractor walkthroughs and get bids well before listing so you can handle deferred maintenance and urgent repairs before they become deal friction.
A professional Property Condition Assessment about a year before listing can help you spot problems early and fix them on your timeline, not during buyer negotiations. That often means fewer surprise objections and less pressure to cut the price later.
For day-to-day operations, it also helps to collect two or three bids each year. It’s a simple way to check pricing, compare scope, and make sure you’re not overpaying.
How do I handle inaccessible areas?
Clearly note any areas you couldn’t access in the report, and explain why the inspection couldn’t happen. That might include locked units, safety hazards, or structural obstructions.
When possible, add photos of the blockage. Then set up a follow-up visit as soon as access is available. As Nolen Masserman, Managing Director at Oakside, notes, clear communication early on helps build trust and avoid last-minute renegotiations.